Bubbling paint is the last thing anyone wants to see when putting hours into painting their walls. Painting your home isn’t as easy as just layering a bunch of coatings on a wall. There are a few factors that some painters fail to consider, and this can lead to paint blistering and bubbling that ruins the entire project. Thankfully, the skilled painters at Dr. Paint know a thing or two about ensuring quality adhesion, and we can help you prevent exterior paint bubbles no matter where or when you decide to paint.
What Causes Paint to Bubble or Blister?
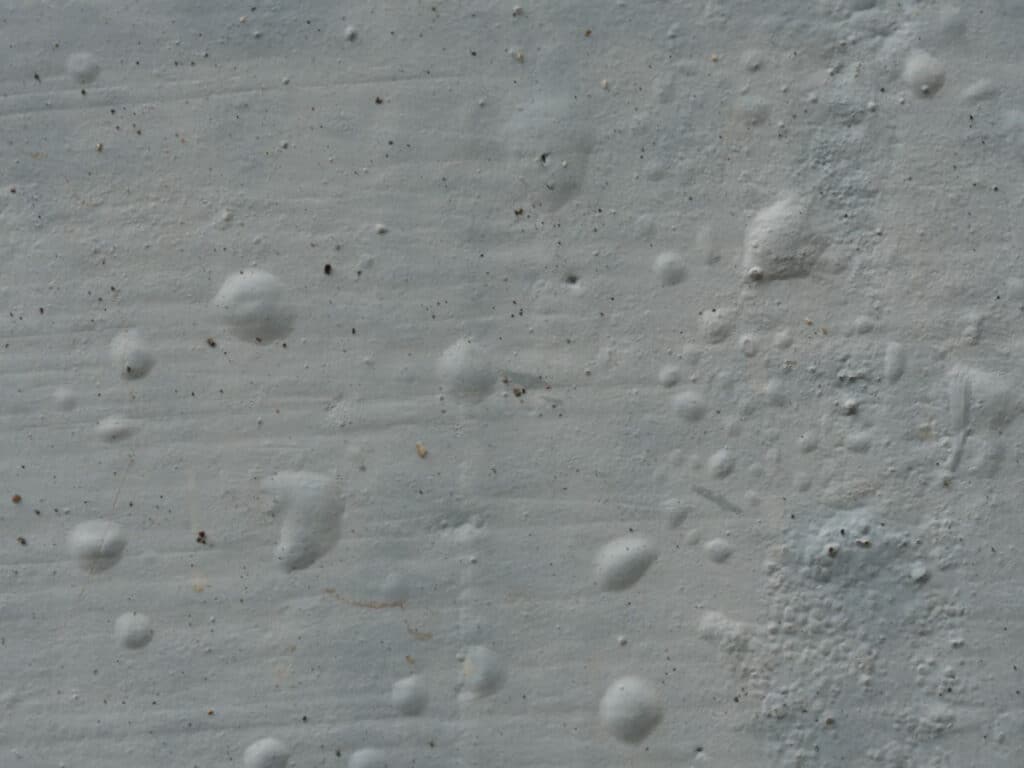
Exterior paint is under heavy stress from the exterior conditions it bears. Over time, the constant expansion and contraction of the surface substrate wear away at your paint’s adhesion. Fluctuating surface temperatures and extreme weather conditions are all responsible for the degradation of your paint. When it loses its adhesion to the surface underneath, the paint will blister and break apart, leaving tiny hairline cracks that are difficult to see with the naked eye.
As paint continues to pull away and these cracks grow, exterior moisture enters the crevices and forms air bubbles that stick out like a sore thumb. Of course, you can repaint the walls, but that might only be a temporary solution. Instead, you’ll need to remedy the problem by getting to the root of the issue. Here are some of the biggest reasons your exterior paint is starting to bubble.
Your Painting Surface Wasn’t Clean
Yes, a dirty surface can mess up your entire paint job. Dirt and grime on your walls make it impossible for the new coat to adhere, especially if the layer of dirt has been present for an extended period. Avoid painting until you give your walls a thorough cleanse.
Did You Forget to Use a Primer?
Paint won’t actually stick to slick surfaces. A good paint job is completed on a wall that’s a bit rough around the edges. Consider sanding your walls or applying a coat of primer. Some primers help protect dirty walls and combat stains, while others help saturate your paint. Choose the option that works best for you, and watch your paint dry perfectly!
Moisture Was Present on Your Walls
Air bubbles form from the paint pulling water off the walls. Moisture is one of the significant causes of paint bubbles and forms from water droplets, leaks, or high humidity levels in the area. Bubbles caused by moisture will often occur after a rainstorm attacks a painted wall that has yet to dry thoroughly.
Surface Temperatures Were Far Too Hot
Certain temperatures are either too hot or too cold for your paint. Odds are you won’t be in the freezing cold, but sometimes direct sunlight and extreme temperatures can warm up your walls to dangerous levels for your paint. This causes the top layer to dry too fast or stretches the side of the paint that’s not in direct heat, leading to bubbling and blistering.
How Do I Fix Bubbling or Blistering Paint?
Fixing paint problems is as simple as avoiding the things that cause them. Before you re-do the job, keep in mind these tips to help your paint dry completely and to ensure that your hard work doesn’t go down the gutter.
- Remove All the Damaged Paint – Your first step should be to scrape off all the paint from your old project. Painting over bubbles will only cause more bubbles, and your focus should be on preparing the surface.
- Remove Moisture Sources – Water on your walls might be an isolated incident. Or it could be from leaking roofs, pipes, or loose plumbing connections. Make sure these sources of moisture are addressed before continuing the project.
- Paint in Appropriate Temperatures – Your paint job should only be performed at certain times of the day and under certain conditions. Try to paint at temperatures of 85 degrees or lower, and avoid daily lows of 40 degrees or lower.
- Paint in Appropriate Weather Conditions – If it’s going to rain later in the day, postpone your paint job. It can take up to 8 hours for your paint to fully cure, so be mindful of the conditions before, during, and after the job.
- Prepare Your Surface – If your painting area is smooth, clean the surface and apply a quality coating to prepare it for the paint job.
- Repaint the Surface – Slowly repaint the wall to avoid bubbles and blistering. Avoid mixing oil and water-based adhesives and paint.
Prevent Paint Bubbling With a Quality Job From Dr. Paint
If you want to prevent paint bubbling and the other problems painters face, make sure you follow our tips and tricks. Keep your surface dry, apply primer and sealers, and avoid humidity and moisture as much as possible, and you’ll be well on your way to a quality paint job.
Or you can leave your painting project in the hands of the experts! At Dr. Paint, our residential painting experts take your home to the next level with a paint job that sticks on the first application. We have all the tips and tricks to handle any painting job on any surface. From stuccoes to siding, give us a call today for an affordable and professional exterior painting job, and check out our work to visualize what we can do for you!
Recent Comments